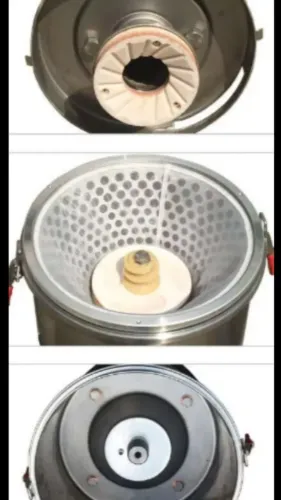
A leaking, distorted or incorrectly specified cap can turn a routine bottle-sterilization cycle into a stoppage, but replacing the wrong component will not solve the fault. You will learn how to identify the cap, separate it from related parts, diagnose the real cause of failed cycles and specify a replacement that supports reliable production.
Key takeaways
- Inspect the gasket, clamps, hinges and vessel rim before restarting.
- Stop the cycle if pressure, temperature or sealing behavior changes.
- Match replacement caps to vessel dimensions, pressure and temperature ratings.
- Record the fault, batch conditions and part measurements before ordering.
What a Glass Bottle Sterilizer Cap Actually Does
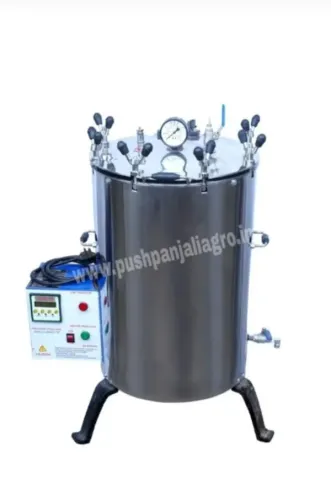
A glass bottle sterilizer cap is usually the removable vessel lid or cover that closes the sterilizer chamber. It sits on the vessel rim and seals against a gasket, while clamps, bolts, hinges or threaded fittings hold it in place.
In some quotations, however, “cap” means a bottle-neck closure or a small cap fitted to an inspection, filling or service port. Confirm the meaning before ordering: these parts are not interchangeable.
| Component | Where it sits | What it does |
|---|---|---|
| Vessel cap or lid | On the sterilizer vessel rim | Closes the chamber and contains steam or hot water |
| Gasket | Between the cap and vessel rim | Forms the pressure seal |
| Pressure gauge | On a connected vessel port | Displays chamber pressure |
| Safety valve | On the vessel or cap assembly | Releases excessive pressure |
| Steam outlet or vent | Through a vessel port or cap fitting | Controls air removal, steam entry or exhaust |
| Bottle rack | Inside the chamber | Supports and spaces the bottles |
A correctly fitted glass bottle sterilizer cap keeps the gasket compressed and preserves the chamber’s designed operating geometry. That prevents steam leakage, pressure loss and a failed temperature hold. The result is fewer reprocessed loads and fewer operator shutdowns.
A warped cap, damaged sealing surface, cracked handle or incorrect diameter can leak around the lid, create a cold spot or expose glass to uneven heating and cooling, delaying production even when the gauge reaches its set point.
How Cap Failures Turn One Batch Into a Shutdown
A cap failure turns a scheduled batch into a shutdown when it no longer holds the vessel’s pressure and heat. Steam escaping at the lid, a hissing sound, or pressure that rises slowly points to a poor seal, damaged seating surface, or distorted cap.
| Failure sign | What it indicates | Production consequence |
|---|---|---|
| Steam leaks around the lid or cap | Gasket has lost compression, or the cap is misaligned | Heat escapes and the sterilization hold may fail |
| Pressure drops during the holding period | Seal leakage, warped threads, or a loose clamp | The batch needs investigation and possible reprocessing |
| Pressure will not rise | A large leak, open vent path, or badly seated cap | The cycle cannot reach its validated condition |
| Repeated wet loads | Steam is condensing or escaping instead of circulating correctly | Bottles leave with moisture and require extra handling |
| Hissing after closure | Gasket damage, a cracked sealing surface, or uneven compression | Operators may stop the cycle for safety |
| Corrosion, a cracked handle, or warped threads | Mechanical damage has changed cap alignment or strength | Forced closure can worsen leakage or cause an unsafe opening |
Do not dismiss physical damage because the gauge reaches its target. A cap with a hard, swollen, cracked, or fragmenting gasket can lose its seal during the hold and create a food-contact risk.
Treat food bottle sterilizer parts as a matched system: cap dimensions, gasket profile, clamps, vent path, and bottle loading affect both heat distribution and cleaning access.
The Operating Checks That Protect Pressure and Heat
Run every load through the same sequence: inspect, load, seal, vent, heat, hold, cool, and verify before unloading. Skipping venting traps air and creates cold spots; abrupt heating or cooling can crack glass through thermal shock.
1. Inspect the cap, gasket, sealing face, clamps, hinges, vent path and pressure-relief components. Replace a flattened gasket, damaged clamp or obstructed vent before loading.
2. Place bottles in the rack with the validated spacing and orientation. Do not pack bottles against the cap or block spray, steam, condensate drains or the temperature probe.
3. Seat the cap evenly and tighten clamps in a balanced pattern. Confirm the gasket remains inside its groove; a pinched seal leaks before pressure reaches the set point.
4. Open the specified vent or air-removal route during the heating phase. Start the holding timer only after the chamber reaches the validated temperature and the validated cold spot has reached it too.
5. During the hold, watch pressure, temperature and the seal perimeter. A falling gauge, hissing sound or visible leakage means the load has not completed reliably; stop and investigate instead of extending the timer blindly.
6. Cool in controlled stages, following the validated pressure-release sequence. Rapid venting can boil condensate, wet the load and break bottles.
7. Before release, check the load for standing water, broken glass and missed temperature records. Record the cap, gasket and glass bottle sterilizer accessories used so repeatable cycles do not become unnecessary reprocessing.
How to Find the Fault Before Ordering a Replacement
Do not order a cap because pressure fell once. Trace the fault in this order, or a gauge, vent, water-level or heating problem will leave a new cap unused.
1. Watch the seal during a cycle. Steam or hot water escaping around the cap’s full perimeter, a continuous hiss, a flattened or cut gasket, corrosion, warped threads or a damaged sealing face points to the cap or gasket. A leak from a valve, pipe joint or gauge connection does not.
2. Compare the pressure gauge with a calibrated test gauge. If both show low pressure, inspect the vent, safety valve and cap seal. If the sterilizer reaches the expected pressure but the panel gauge reads differently, repair or replace the gauge instead.
3. Check the vent path while the chamber heats. Trapped air causes a low temperature despite rising pressure and produces cold spots. A blocked vent or incorrect loading pattern can mimic cap failure.
4. Confirm the water level and heater operation against the machine instructions. Low water exposes the heater and stops steam generation; a failed element, fuse or controller leaves pressure and temperature low without leakage at the cap.
5. Inspect bottles and racks for blocked circulation, overcrowding or cold water entering too quickly. Breakage or wet loads after a sound pressure hold points to loading, drainage or heating distribution.
For sterilizer cap replacement in Ambala, send photographs, nameplate data, cap measurements and cycle temperature and pressure. Identify whether you need the vessel lid, gasket, port cap or bottle closure; these parts are not interchangeable.
How to Specify and Accept a Replacement Cap
A supplier cannot quote accurately from “glass bottle sterilizer cap” alone. State whether you need the vessel lid, a bottle-neck closure, or a cap for an individual port; these parts are not interchangeable. For a glass bottle sterilizer cap for food processing in Ambala, send:
- The sterilizer make, model, serial number, nameplate photograph, and clear photographs of the cap, hinge, clamps, gasket and sealing face.
- Outside diameter, sealing diameter, thickness, bolt or clamp pattern, hinge position, port locations, and any drawing or worn-part measurements.
- Material, surface finish, gasket material and profile, plus the maximum operating temperature and pressure.
- Cycle details: heating method, holding temperature, pressure, load size, bottle dimensions and loading pattern.
- A written list of included glass bottle sterilizer accessories, such as the gasket, clamps, hinge, handle, vent or relief components, probe and bottle rack. Ask which existing parts can be reused.
Accept the part only after installation checks confirm that the cap closes squarely, the gasket seats continuously, clamps lock without distortion, and the vent path and probe position match the validated arrangement. Run representative loaded cycles and record temperature uniformity or the validated cold spot, pressure retention or leakage, bottle breakage, gasket condition and repeatability.
Reaching the set-point alone is not acceptance.
Pushpanjali Industries can help compare the replacement against the equipment’s actual dimensions and cycle conditions rather than treating a locally available cap as automatically suitable.
Related product
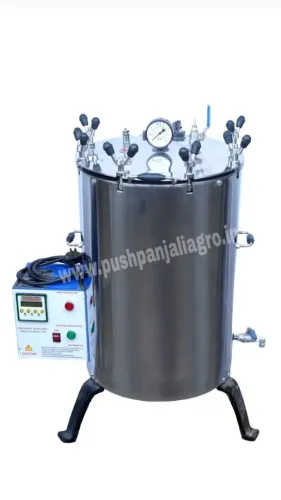
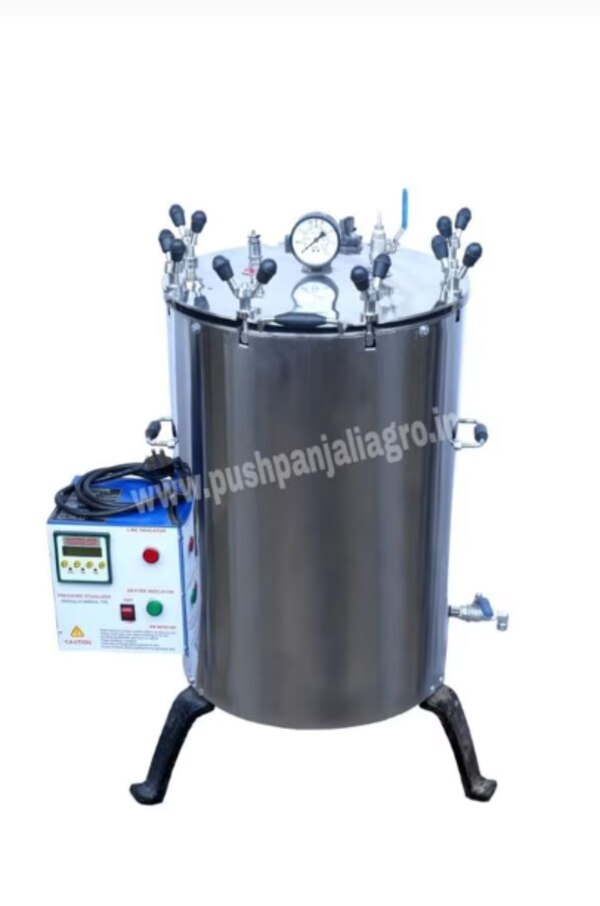
 | Glass Bottle Sterilizer (cap. 80 lts.) Pushpanjali Agro Vertical Autoclave, a high-pressure steam sterilizer commonly used in food processing, laboratories, and medical facilities to kill... View product → |
Frequently asked questions
What does a glass bottle sterilizer cap do?
It closes the sterilizer chamber and seals against a gasket while clamps, bolts, hinges or threaded fittings hold it in place.
How can a sterilizer cap failure delay production?
A poor seal can cause steam or pressure loss, interrupting the cycle and forcing inspection, cooling, cleaning and possible batch disposal.
Which operating checks protect pressure and heat?
Check the gasket, vessel rim, clamps or bolts, pressure gauge, temperature reading, safety valve and signs of steam leakage before operation.
What should you check before ordering a sterilizer cap replacement?
Record the vessel diameter, cap style, gasket dimensions, fixing arrangement, pressure and temperature requirements, and the exact fault.
Keywords